How to Clean Riding Boots - A Step-By-Step Guide
Just got out from a long day with your horse and noticed your tall boots losing their shine?
Dirt, dust, and regular use can weaken the leather, making your boots look older than they are. But fear not, with the right care, your investment doesn't have to deteriorate quickly.
Here's everything you need to know to keep your riding boots in good condition. From buffing away scuffs to preserving the leather's integrity, taking care of your boots is crucial for every rider.
After all, both you and your horse deserve the finest tack. Stick around to learn the tricks to maintaining those boots just right.
Cleaning the Exterior of Riding Boots
To clean the exterior of your riding boots, you will need a few supplies:
- A soft-bristled brush/horsehair brush or cloth
- Warm water
- Mild soap or saddle soap
- Leather cleaner and conditioner (optional)
- Paper towels or a soft towel for drying
Step 1: Removing Debris and Dust
First, use a soft-bristled brush or a horsehair brush to remove any debris or dust from your boots, including the sole area. For boots with zippers, ensure you gently brush around the zipper to prevent any damage. This initial cleaning will prepare your boots for a more thorough wash.
Step 2: Wiping with a Damp Cloth
Take a damp cloth or sponge and gently wipe the exterior of the boots. Focus on any areas that are particularly dirty or have scuff marks. Using a damp cloth helps to soften the dirt without soaking the leather, making it easier to clean.
Step 3: Applying a Mild Soap Solution
Create a mild soap solution using warm water and a small amount of mild soap or saddle soap. Dip a sponge into the solution and wring it out until it's damp but not dripping. Gently apply it to the boots in a circular motion, paying extra attention to tougher stains.
Step 4: Rinsing the Soap Off
After applying the soap solution, take another clean, damp cloth to wipe off any remaining soap from the boots. It's important to ensure all soap is removed, as leftover residue can dry out the leather, leading to cracks.
Step 5: Drying with a Soft Towel
Use a soft towel or rag to gently pat the boots dry. Avoid rubbing harshly, as this can damage the leather. Allow the boots to air dry completely in a well-ventilated area but away from direct sunlight or heat sources, which can cause the leather to warp or crack.
Step 6: Applying Leather Conditioner
Once your boots are dry, apply a leather conditioner using a sponge or soft cloth. This will keep your boots shiny, supple, and prevent cracking. Work the conditioner in with circular motions and allow it to absorb into the leather before moving to the next step.
Step 7: Polishing for Extra Shine
For an extra shine on your paddock boots or tall boots, apply a small amount of boot polish or leather polish with a soft cloth or sponge. Use circular motions to work the polish into the leather, focusing on achieving an even coat. This not only adds shine but also adds a layer of protection to the leather.
Step 8: Final Buffing
Finally, take another clean, soft rag or brush to clean off any excess polish and buff the boots to a high shine. Pay special attention to the areas where you apply polish, ensuring a uniform and glossy finish. Your riding boots are now clean, conditioned, and ready for your next equestrian adventure.
Read related article: What Are Riding Boots - Equestrian Footwear Guide
Cleaning the Interior of Riding Boots
After you clean and polish your boots' exterior, it's essential to address the interior to maintain their condition and prevent odors.
Here are some things you need to get started:
- A boot jack or something sturdy to hold your boots while cleaning
- Warm water
- Mild soap or saddle soap
- Paper towels or a soft towel for drying
- Shoe deodorizer
Step 1: Preparing Your Boots
Before addressing the interior, ensure your boots are secure on a boot jack or similar tool to prevent them from moving. This stability is crucial for a thorough cleaning. Additionally, removing any insoles can aid in accessing the full interior, allowing household cleaners to reach deeper into the boot leather, thereby improving its longevity.
Step 2: Vacuuming Dust and Dirt
Using a handheld vacuum or an attachment, carefully vacuum the interior of each boot to remove dust, dirt, and other small particles. This initial step is essential for maintaining the boot leather's integrity by preventing abrasive particles from scratching or wearing down the interior surface over time.
Step 3: Applying a Mild Soap Solution
Create a solution with warm water and a small amount of mild soap. Dip a soft cloth into the mixture, wring it out, and gently wipe the inside of the boots. This method ensures that you're not oversaturating the boot leather with water, which can be detrimental to its longevity.
Step 4: Wiping Down with a Damp Cloth
Following the soap application, take a clean cloth dampened with just water and wipe down the interior to remove any soap residue. Ensuring all household cleaners are removed is crucial to prevent the boot leather from drying out or becoming damaged over time.
Step 5: Deodorizing for Freshness
After cleaning, spray a gentle shoe deodorizer inside each boot to tackle any remaining odors without harming the boot leather. Choosing a deodorizer designed for use on leather ensures that you maintain the material's quality while adding to the boots' overall longevity. Allow the boots to air dry completely in a well-ventilated area before use.
Read related article: How To Break in Riding Boots - 5 Different Ways

Get your Stone and Clark Shoe Deodorizer here!
Useful Tips to Maintain Your Riding Boots
- Invest in Quality Leather Care Products: Regularly treating your riding boots with high-quality leather care products can significantly extend their life. Brands like Stone and Clark offer premium options that are specifically designed for leather footwear.
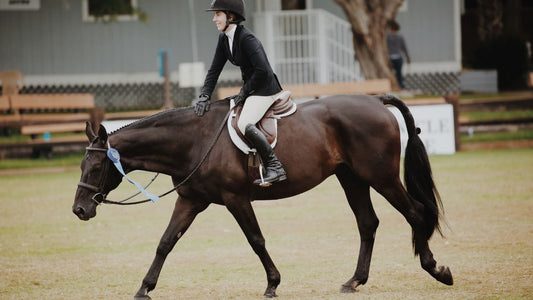
- Use Boot Trees: To maintain the shape and integrity of your boots, always insert boot trees when you're not wearing them. This prevents creases and helps the leather to dry out more evenly, especially after a long day in the show ring.
- Store in a Boot Bag: Protect your boots from dust, spills, and scratches by storing them in a dedicated boot bag. This is particularly useful for transportation to and from events, ensuring your boots are show-ring ready.
- Clean Regularly: Don't wait for the build-up to become a cake of mud and dirt. Regular cleaning and conditioning keep the leather supple and can prevent irreversible damage.
- Avoid Direct Heat and Sunlight: When drying your boots, avoid placing them in direct sunlight or near heat sources. This can lead to the leather warping or cracking over time.
- Deodorize: Incorporating a deodorizing step into your boot care routine can keep them smelling fresh, making for a more pleasant experience every time you slip them on.
These simple yet effective tips can help ensure your riding boots remain in tip-top condition, ready for any equestrian adventure that comes your way.
Closing Thoughts
There's no better way to ensure the longevity and performance of your equestrian gear than by dedicating time to clean your riding boots meticulously. Remember, take care of your riding boots, and they will take care of you, providing comfort, protection, and style in the arena or on the trail.
Through regular maintenance, you not only preserve their appearance but also the memories made with every ride.

For an all-in-one solution, check out Stone and Clark's Leather Shoe Shine Kit, which includes all the products you need to keep your riding boots in top shape.